by Aidan Doyle
Editor’s note: Aidan Doyle’s introduction to writing interactive stories can be found here.
Although creating interactive stories with Twine is generally easy, one of the confusing things is there are major differences between Twine 1 and Twine 2, and many tutorials still refer to version 1. I’ll be using syntax from Twine 2. The other confusing thing is there are different story formats and not only do they have different stylesheets, but they also have different syntax. Until you’re more familiar with Twine, I recommend sticking with the default format, Harlowe. It makes things simpler.
Passages
Twine is based around the idea of passages (similar to scenes in a story), which appear as boxes on the editor screen. Double click a passage to edit the text. To create a link to another passage you enclose the text in double brackets. [[North Door]] creates a link to a passage (which Twine automatically creates if a passage with that name doesn’t already exist). You can also create a passage by clicking the green menu button.
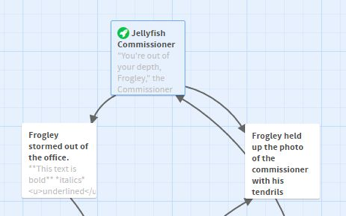
Let’s say you want to write a story about the adventures of Jack Frogley, Swamp Cop. The story opens with Frogley confronting the Jellyfish Commissioner. The reader can choose to storming out of the commissioner’s office or try to blackmail him.
“You’re out of your depth, Frogley,” the Commissioner shouted.
[[Frogley stormed out of the office.]]
[[Frogley held up the photo of the commissioner with his tendrils around the mayor’s wife.]]
Twine gives you a graphical depiction of how your passages are linked.
To step through your story, press the play button. To change where your story starts, select a passage and click the Rocket button.
Sometimes the text you want the reader to see differs from the name of the passage. For example, you don’t want to give away the results. You could link to a passage called Jack’s Apartment by using ->.
[[Frogley stormed out of the office->Jack’s Apartment]].
Choices and Variables
Twine’s variables let you show different text depending on the reader’s choices. The Commissioner will respond differently depending on whether Frogley has shown his wife the photograph. In the passage where Frogley shows her the photograph you set a variable to true.
(set: $showedPhoto to true)
Then when Frogley visits the Commissioner, check whether this variable is true and put the matching text in brackets.
(if: $showedPhoto is true)[
The Commissioner pointed a gun at Frogley. “Give me one good reason why I shouldn’t kill you.”
]
(else:)[
“Please don’t show the photo to my wife,” the Commissioner begged.
]
You can choose your own variable names, but names which explain what the variable refers to make things easier.
Variables also help keep track of how many times Frogley has been shot. At the start of your story set the variable to its initial value.
(set: $frogleyShotCount to 0)
Increment it each time Frogley is shot.
(set: $frogleyShotCount to it + 1)
To reference the value in the text.
Frogley smiled. I’ve only been shot ($frogleyShotCount) times.
To format it to match for plurals you can use
I’ve only been shot $frogleyShotCount
(if: ($frogleyShotCount) is 1)[time]
(else:)[times]
If you want a variable to be text (rather than true/false or a number) then use quotation marks.
(set: $swampName to “Swampopolis”)
To get input from the reader you can use prompt
(set: $dogName to (prompt: “What is the name of your dog?”))
Sometimes you want the text to be different depending on whether the reader has read that passage before. You can do this by checking if history contains the passage’s name.
(if: (history:) contains “Jake’s Apartment”)[Jake took the elevator to his apartment.]
(else:)[Jake’s apartment was on the bad side of the swamp, but at least it was cheap. He took the elevator to the ninth floor.]
Formatting Your Story
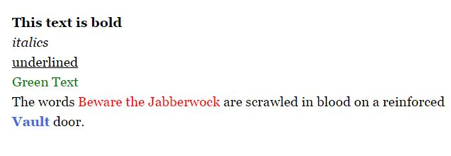
Twine supports both HTML and markdown.
**This text is bold**
*italics*
<u>underlined</u>
<font color=”green”>Green Text</font>
You can also apply formatting information by wrapping items in single (as opposed to double) brackets.
The words (text-color: “red”)[Beware the Jabberwock] are scrawled in blood on a reinforced [[Vault]] door.
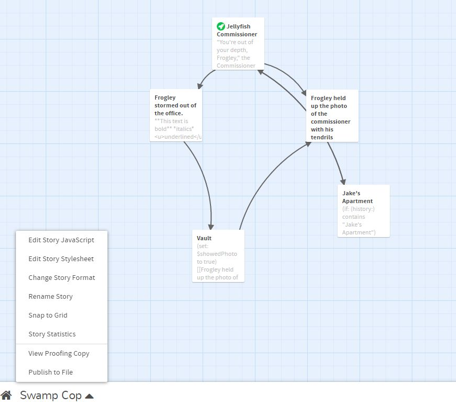
I usually turn off the undo button (so readers can’t change their choice after they’ve made it). To do this you need to edit the story’s stylesheet. Clicking the triangle on the lower LHS of the window gives you a menu where you can choose Edit Story Stylesheet.
Add the following lines to hide the undo/redo buttons.
.redo {display: none}
.undo {display: none}
If you want to change the story’s background color (keeping in mind that black text on a white background is hard to beat for readability) you can add CSS (using HTML RGB color codes) to the stylesheet. To get a green background
body
{
background-color: #00ff00;
}
You can also use HTML to display images.
<img src=”filename.jpg”>
In this case the image file should be in the same directory as your exported file. (This means you won’t be able to see it when you’re playing through a test version. For testing you can specify the file’s full path, but remember to change it back before you do a final export.)
When you have lots of code (as opposed to story text) it can create unwanted line breaks. Use braces to ignore whitespace.
{
(set: $someVariable to “someContent”)
The text here
will all
appear on the same line.
}
Javascript
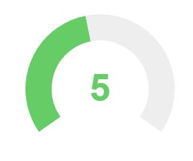
Twine also supports javascript, so if you’re familiar with that, you can incorporate javascript libraries for fancy effects. I used a jquery plugin to add a dial which readers could adjust.
Publishing Your Story
To export your story, choose the Publish File option from the story menu (by clicking on the triangle at the bottom of the window). This will let you save anan HTML file which you can give to readers. You can try submitting the file to markets like sub-Q or Strange Horizons. Or you can put the story on your own web site. Philome (http://philome.la/) also offers free hosting for Twine stories.
Further Resources
Twine Introduction
http://twinery.org/wiki/twine2:guide
Harlowe Reference
http://twine2.neocities.org/
How to choose a story format.
http://twinery.org/wiki/twine2:how_to_choose_a_story_format
Adding Custom JavaScript
http://twinery.org/wiki/twine2:adding_custom_javascript_and_css
HTML Colors
http://htmlcolorcodes.com/
Chris Klimas (Twine creator) A Short History of Interactive Fiction